Search the Help Center
eScholarship Repository User Guide

This guide demonstrates how to deposit new content and manage existing content using the eScholarship Repository Submission Management System. The content types covered in this guide are:
- UC Open Access Policy deposits
- Published articles, books, book chapters, and non-textual media
- New works not previously published elsewhere, such as working papers, new books, data sets and more
This guide does not cover our peer-review and publication management system for eScholarship Journals. If you are looking for resources on the eScholarship Journal Publishing System, please go to the Journals help page.
Topics in this guide:
- Getting Started
- Deposit & Manage Your Content
- My Account Login
- Submission Form
- Item Summary
- My Account Dashboard
- Manage Items
- Item Summary (Administrator view)
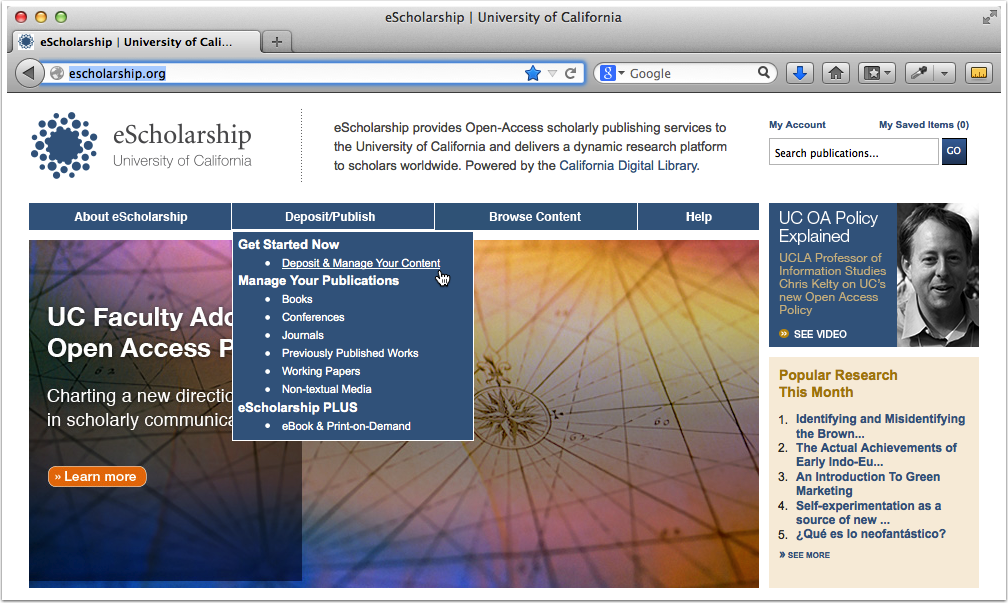
1. Getting started
The easiest place to get started is www.escholarship.org.
Select Deposit & Manage Your Content in the Deposit/Publish menu.
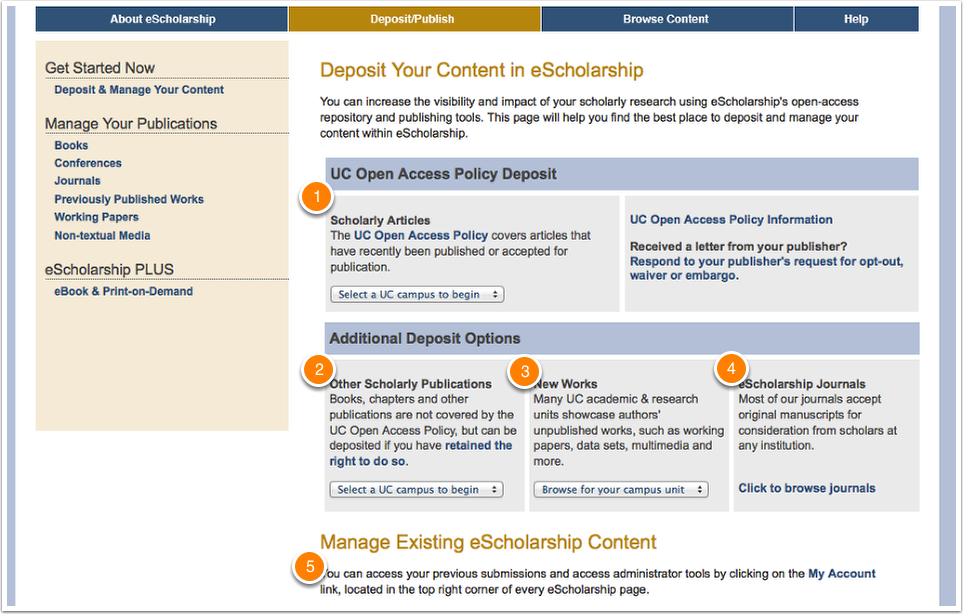
2. Deposit & Manage Your Content
The Deposit & Manage Your Content page will help guide you to the best place to begin your deposit and also contains information on how to manage existing content.
Depending on your selection, you will be directed to the login form, or will need to browse further:
- Scholarly Articles (UC Open Access Policy): Once you've selected a campus you will be asked to log in. After logging in you can begin your deposit.
- Other Scholarly Publications: Once you've selected a campus you will be asked to log in. After logging in you can begin your deposit.
- New Works: Select a campus, then browse the page that follows for your academic unit. On your academic unit's landing page, select the Submit or Administrator Login button to get started.
- eScholarship Journals: Select the browse link, then locate your journal. On the journal's landing page, select the Submit or Administrator Login button to get started.
- Manage Existing Content: The My Account link will take you to the My Account dashboard, where you can view all pending and previously submitted content. (Skip to My Account dashboard.)
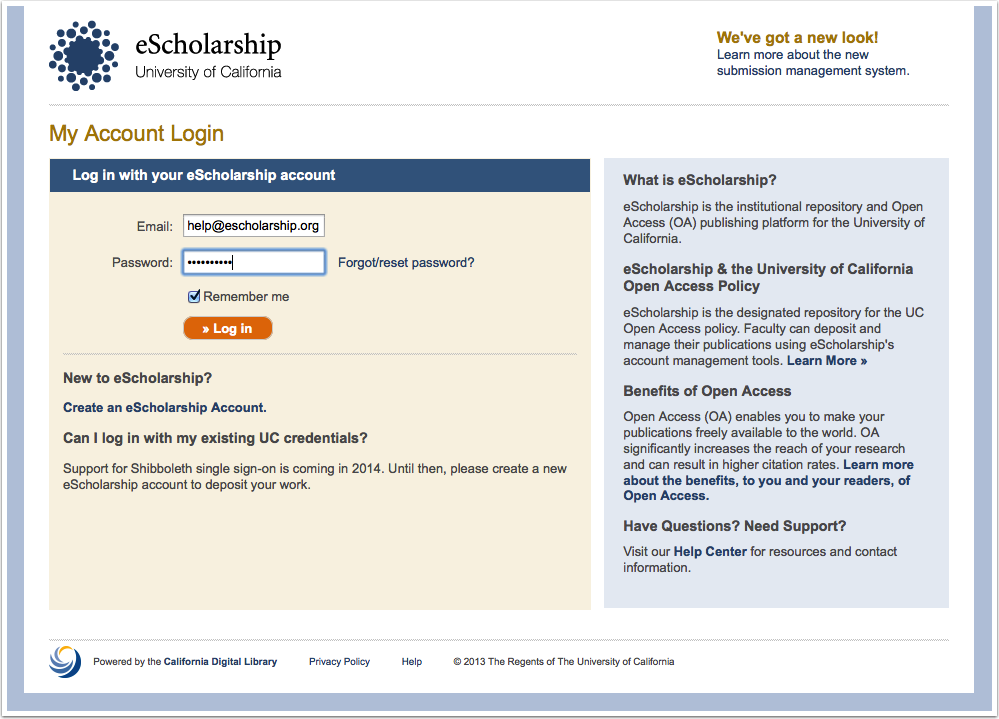
3. My Account Login
Once you've made your selection on the Deposit & Manage Your Content page (or once you have browsed to a unit or publication and clicked on a Submit or Administrator Login button) you'll be presented with the My Account Login page.
Enter your email address and password, then click the Log in button.
If you do not have an eScholarship Account, you'll need to create one before logging in for the first time. (Tip: It's best to use your UC email address, if you have one, when creating a new eScholarship Account.)
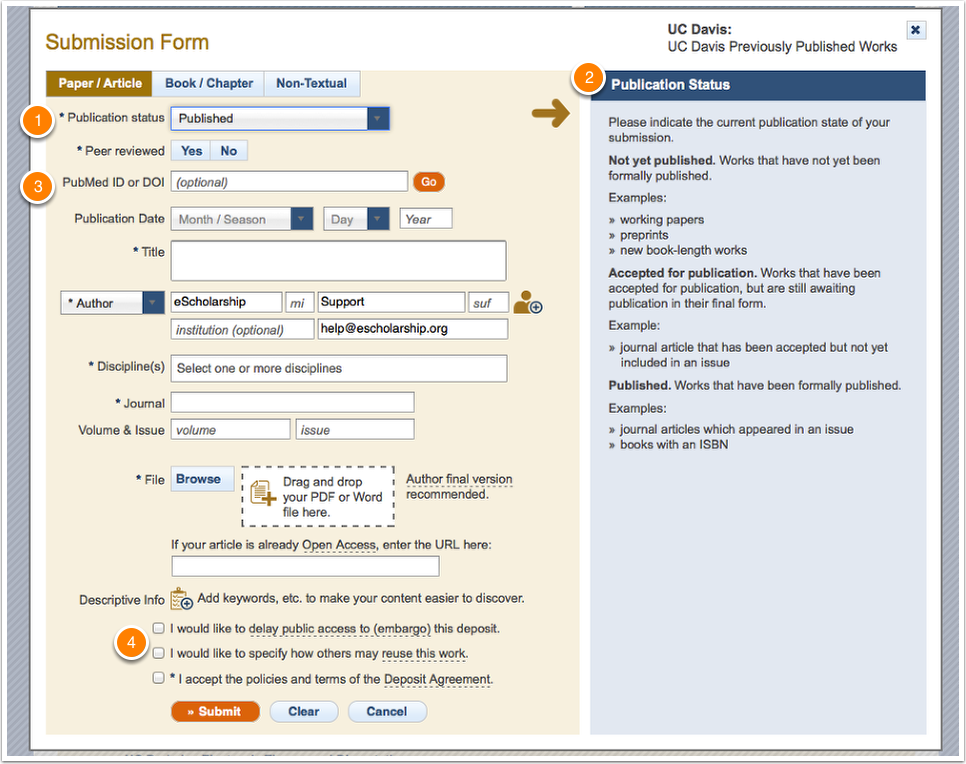
4. Submission Form
Next you should see the Submission Form. (If you instead see the My Account dashboard page, skip to My Account dashboard for guidance.)
- What's required? Fields marked with an * are required; all other fields are optional.
- Help when you need it: If you need more information about a field, or want to provide more detailed information, click on the field and look for guidance and additional options in the blue sidebar.
- Let us fill it out for you: If your publication has a PubMed ID or DOI, you can enter it and click the Go button to automatically complete the form.
- More control over your publications: New options near the end of the form allow you to delay public access to (embargo) your deposit and specify reuse terms.
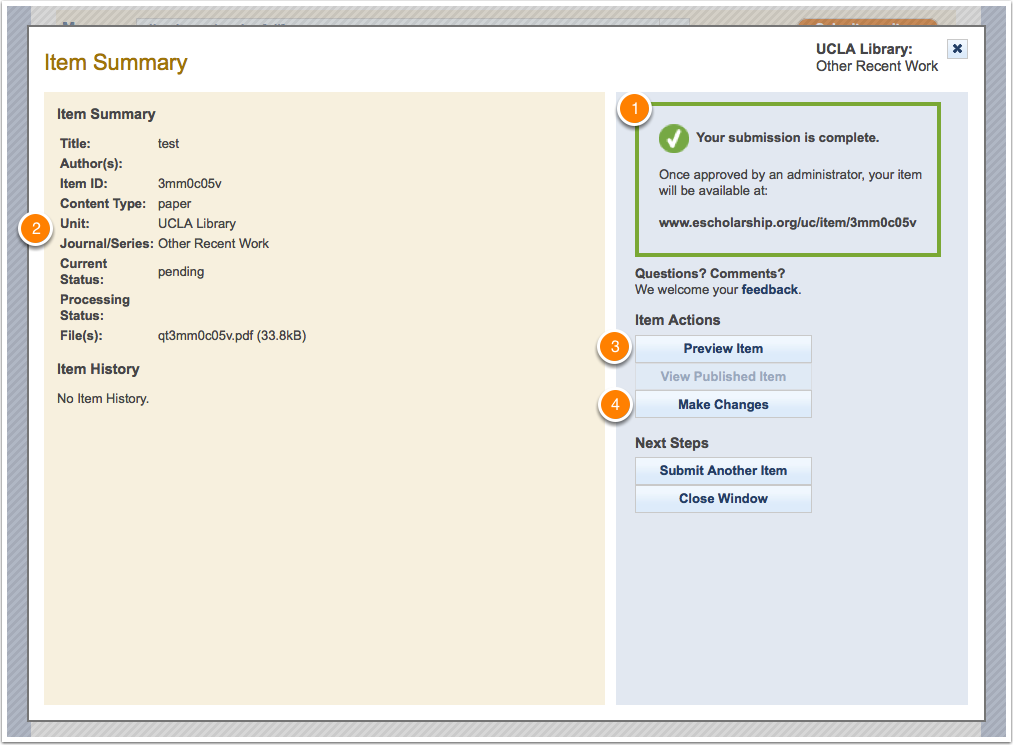
5. Item Summary
Once you click the Submit button, you'll arrive at the Item Summary screen.
- Article status: Your new submission will be pending until an administrator approves it.
- Review the details: Take a moment to review your entries and check for any typos or omissions.
- See how it looks: Even while pending approval, you can preview your item to see exactly how it will look on eScholarship.
- Need to make a change? The Make Changes button will take you back to the Submission Form if anything needs to be updated.
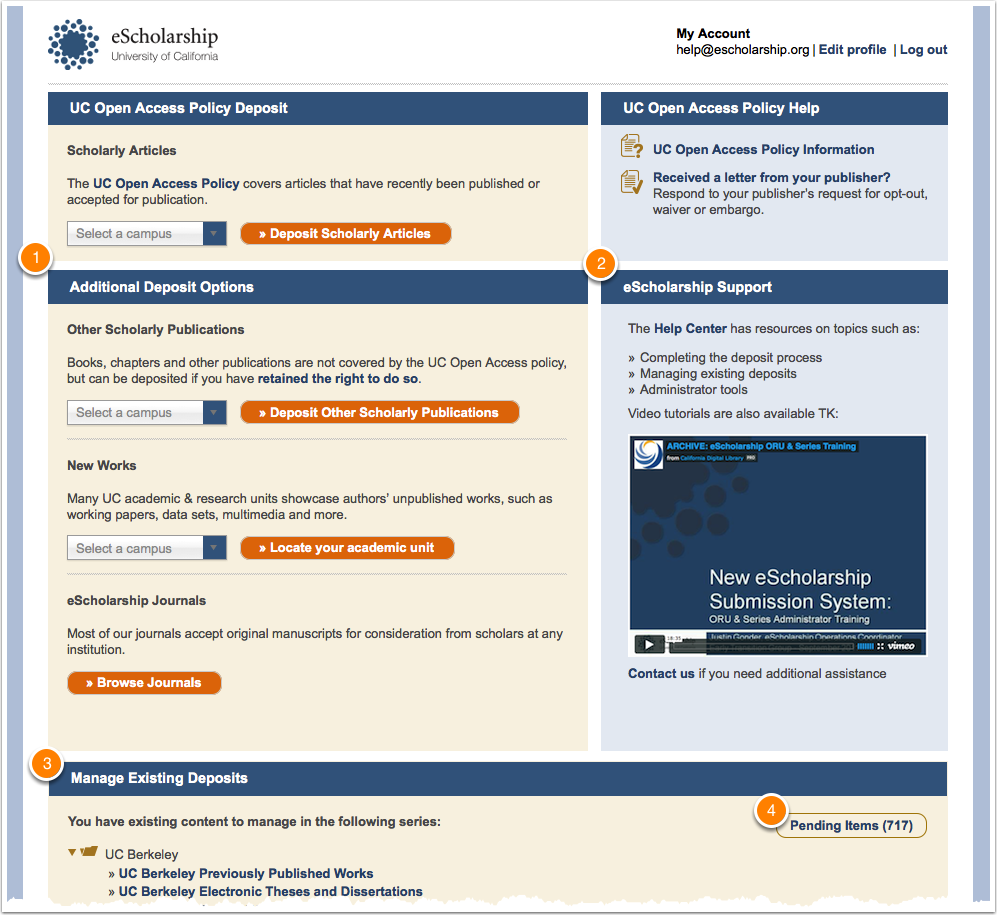
6. My Account Dashboard
The My Account dashboard will appear when you've completed a new submission and have closed the Item Summary, or when you've selected the My Account or Manage Existing eScholarship Content options on eScholarship.org.
- Deposit Options: The deposit options here are the same as options found on the Deposit & Manage Your Content page. For more information about these options see Deposit & Manage Your Content.
- Help and Resources: Links to resources related to the UC Open Access Policy, as well as general eScholarship Support are available in the blue sections.
- Manage Existing Deposits: Here you'll find a list of all the Academic Units, Series & Publications for which you are an Administrator, or to which you have previously submitted content. Click on any item in this list to view existing content.
- Pending Items: A quick link for Administrators to view all content awaiting their approval.
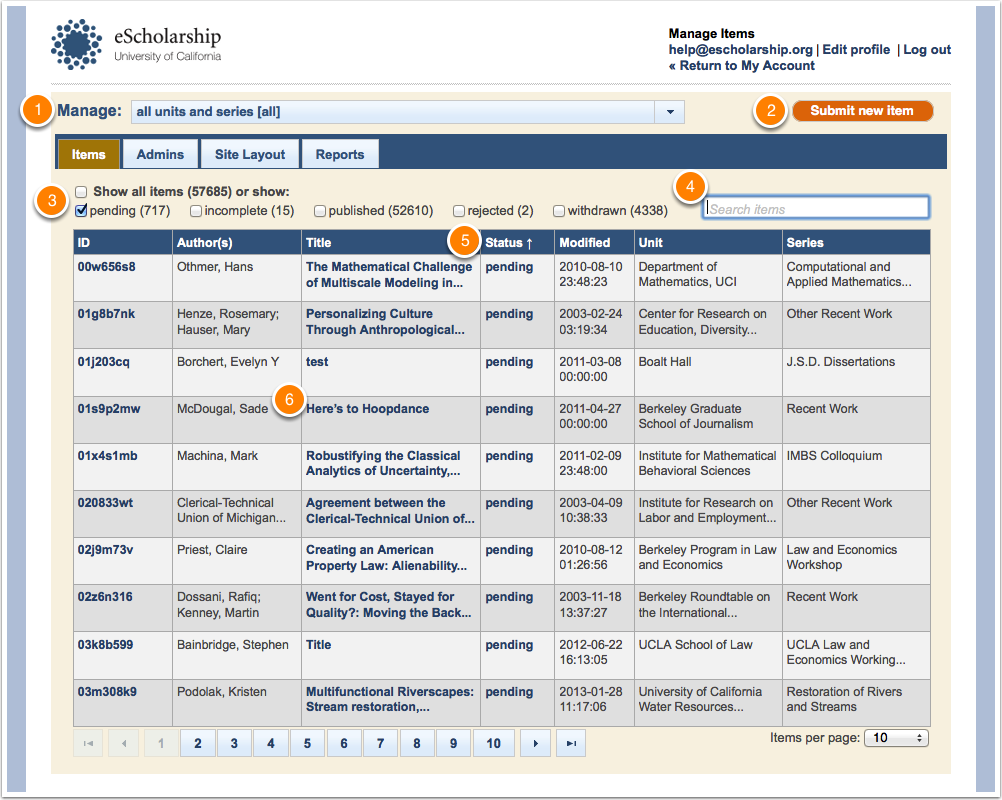
7. Manage Items
Selecting any of the Manage Existing Deposit options will bring you to the Manage Items page.
- Explore other areas: You don't need to return to the My Account dashboard to view a different unit; you can view another unit, series or publication using the Manage menu.
- Quickly submit new content: The submit button will open a new Submission Form for the selected series.
- Narrow or expand your view: Use the checkboxes to view only the subset of items you want to see.
- Find a specific item, fast: Use the search box to locate an item by title, author or keyword.
- Sort your results: Click any column heading to re-sort the Manage Items table.
- Click to take action: Click any item's title to view its details, make changes or approve it for final publication.
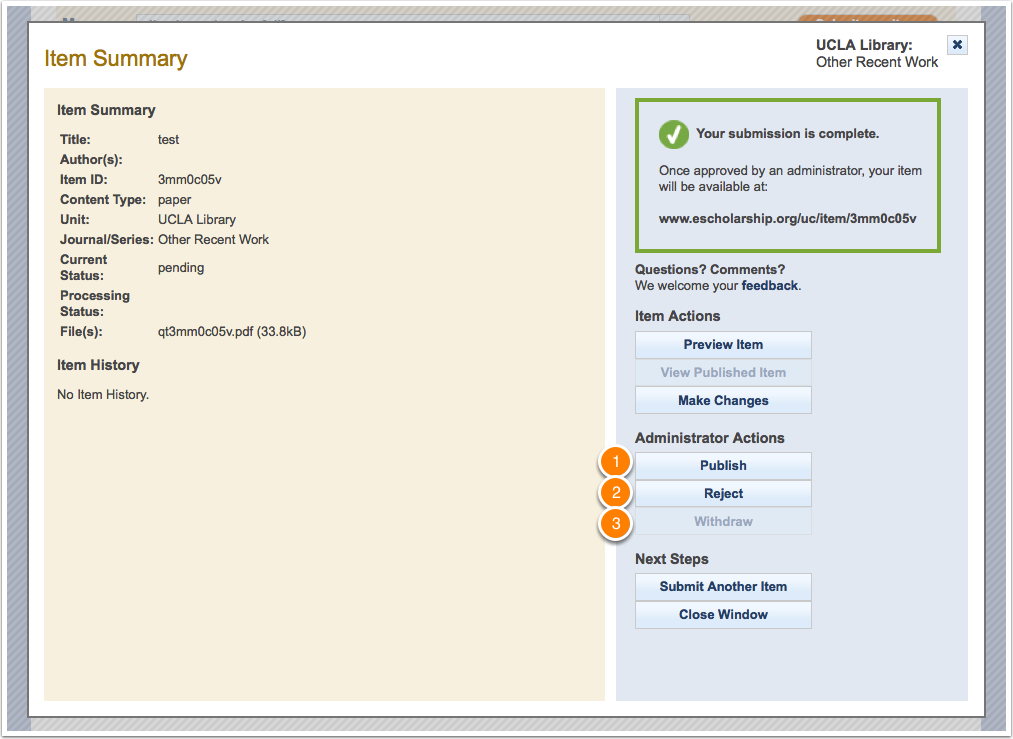
8. Item Summary (Administrator view)
An Administrator's view of a pending item is much the same as an author's, but with a few additional options:
- Publish: When selected, the item will appear on eScholarship.org within about 10 minutes (longer for very large items).
- Reject: When selected, marks the item as Rejected. Administrators will have the option of alerting the original submitter via email that the item has been rejected.
- Withdraw: When selected, alerts eScholarship Support that an item should be withdrawn. You must specify a reason for the withdrawal request. Please see eScholarship's Content Removal Guidelines for more information.
Of course Administrators can also make full use of the options covered elsewhere in this guide, such as Make Changes and Preview Item. For more information, see Item Summary.